4 Learnings from Multi-Session Events in Customer Insights - Journeys
Four practical lessons from implementing multi-session events in Customer Insights - Journeys, covering registration forms, session visibility, confirmation emails, and cancellations.
I’m standing at my desk with the air from the fan hitting my back. In front of me, my client asks how we could improve registration for an event with three workshops running at the same time.
For me, the answer was clear: sessions. But my client had never worked with them before.
And lately, they haven’t been the only client asking about this kind of event. That encouraged me to revisit session management in Dynamics 365 Customer Insights - Journeys and see how it behaves in real implementations.
Here are four things I learned along the way.
NOTE
TL;DR:
-
Only publish sessions attendees should actually see and register for; draft sessions are useful for internal agenda items.
-
For simultaneous sessions, the standard registration experience may need custom logic to prevent attendees from choosing conflicting time slots.
-
Session registration data works well in confirmation emails, but a small Dataverse customization can make sorting by session start time much easier.
Why use sessions in the first place
Sessions are a structured way to manage an event agenda. They’re especially useful for events with multiple presentations or workshops, as they allow you to track how many attendees have registered for each one.
They also help with event coordination by letting you manage capacity for individual sessions. Instead of keeping the agenda in a separate document or note, everything stays connected to the event and visible in the calendar.
And sessions aren’t limited to in-person events. Customer Insights - Journeys also supports online sessions with different Microsoft Teams meetings, making it possible to run simultaneous virtual sessions with separate registrations.
My 4 Implementation learnings
1. If you don’t want to show some sessions, just leave them in draft
When you’re in an event and you click on the agenda tab, it will display a calendar view with a sub-grid underneath. The sub-grid will show the sessions that you have linked to this event, and even a summary of all the people registered to each session.
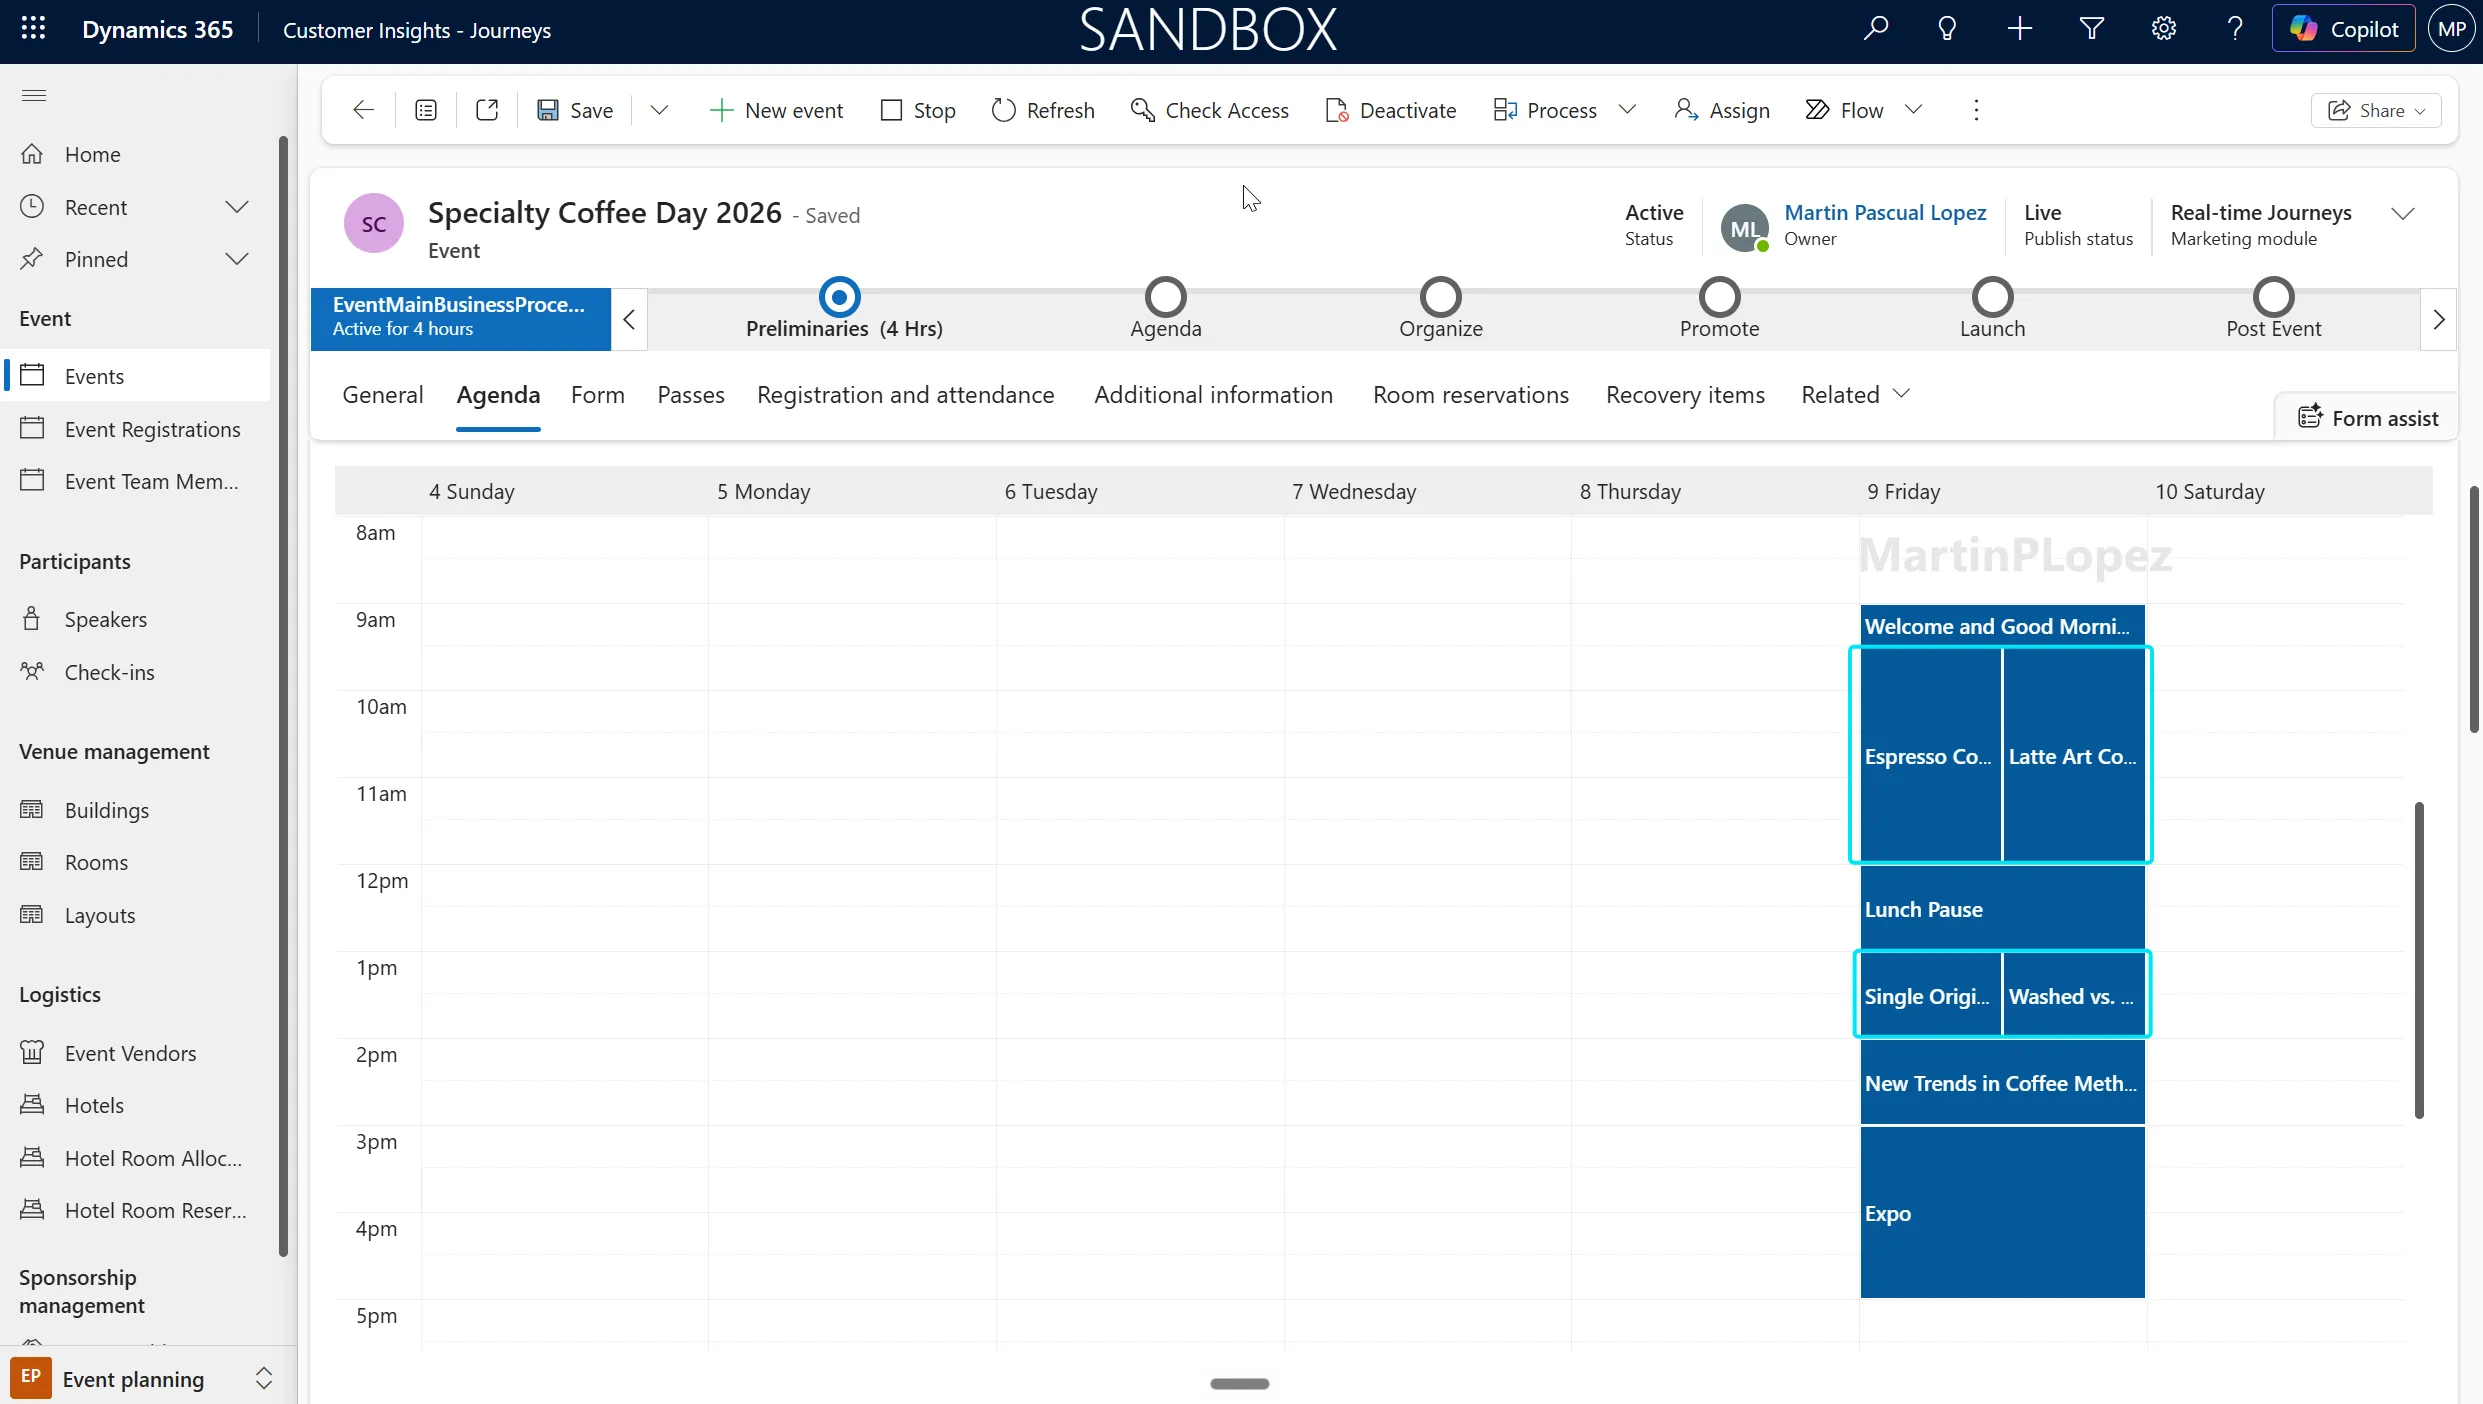
This overview might not be for every user. So to prevent users from registering for the lunch pause, it’s as simple as leaving the sessions as draft, and only Live sessions will be available for registration.
2. Adapting the form is a must, especially with simultaneous sessions
It’s not a surprise that the form that Microsoft provides to register sessions is neither looking great, nor very functional with some requirements of some customers.
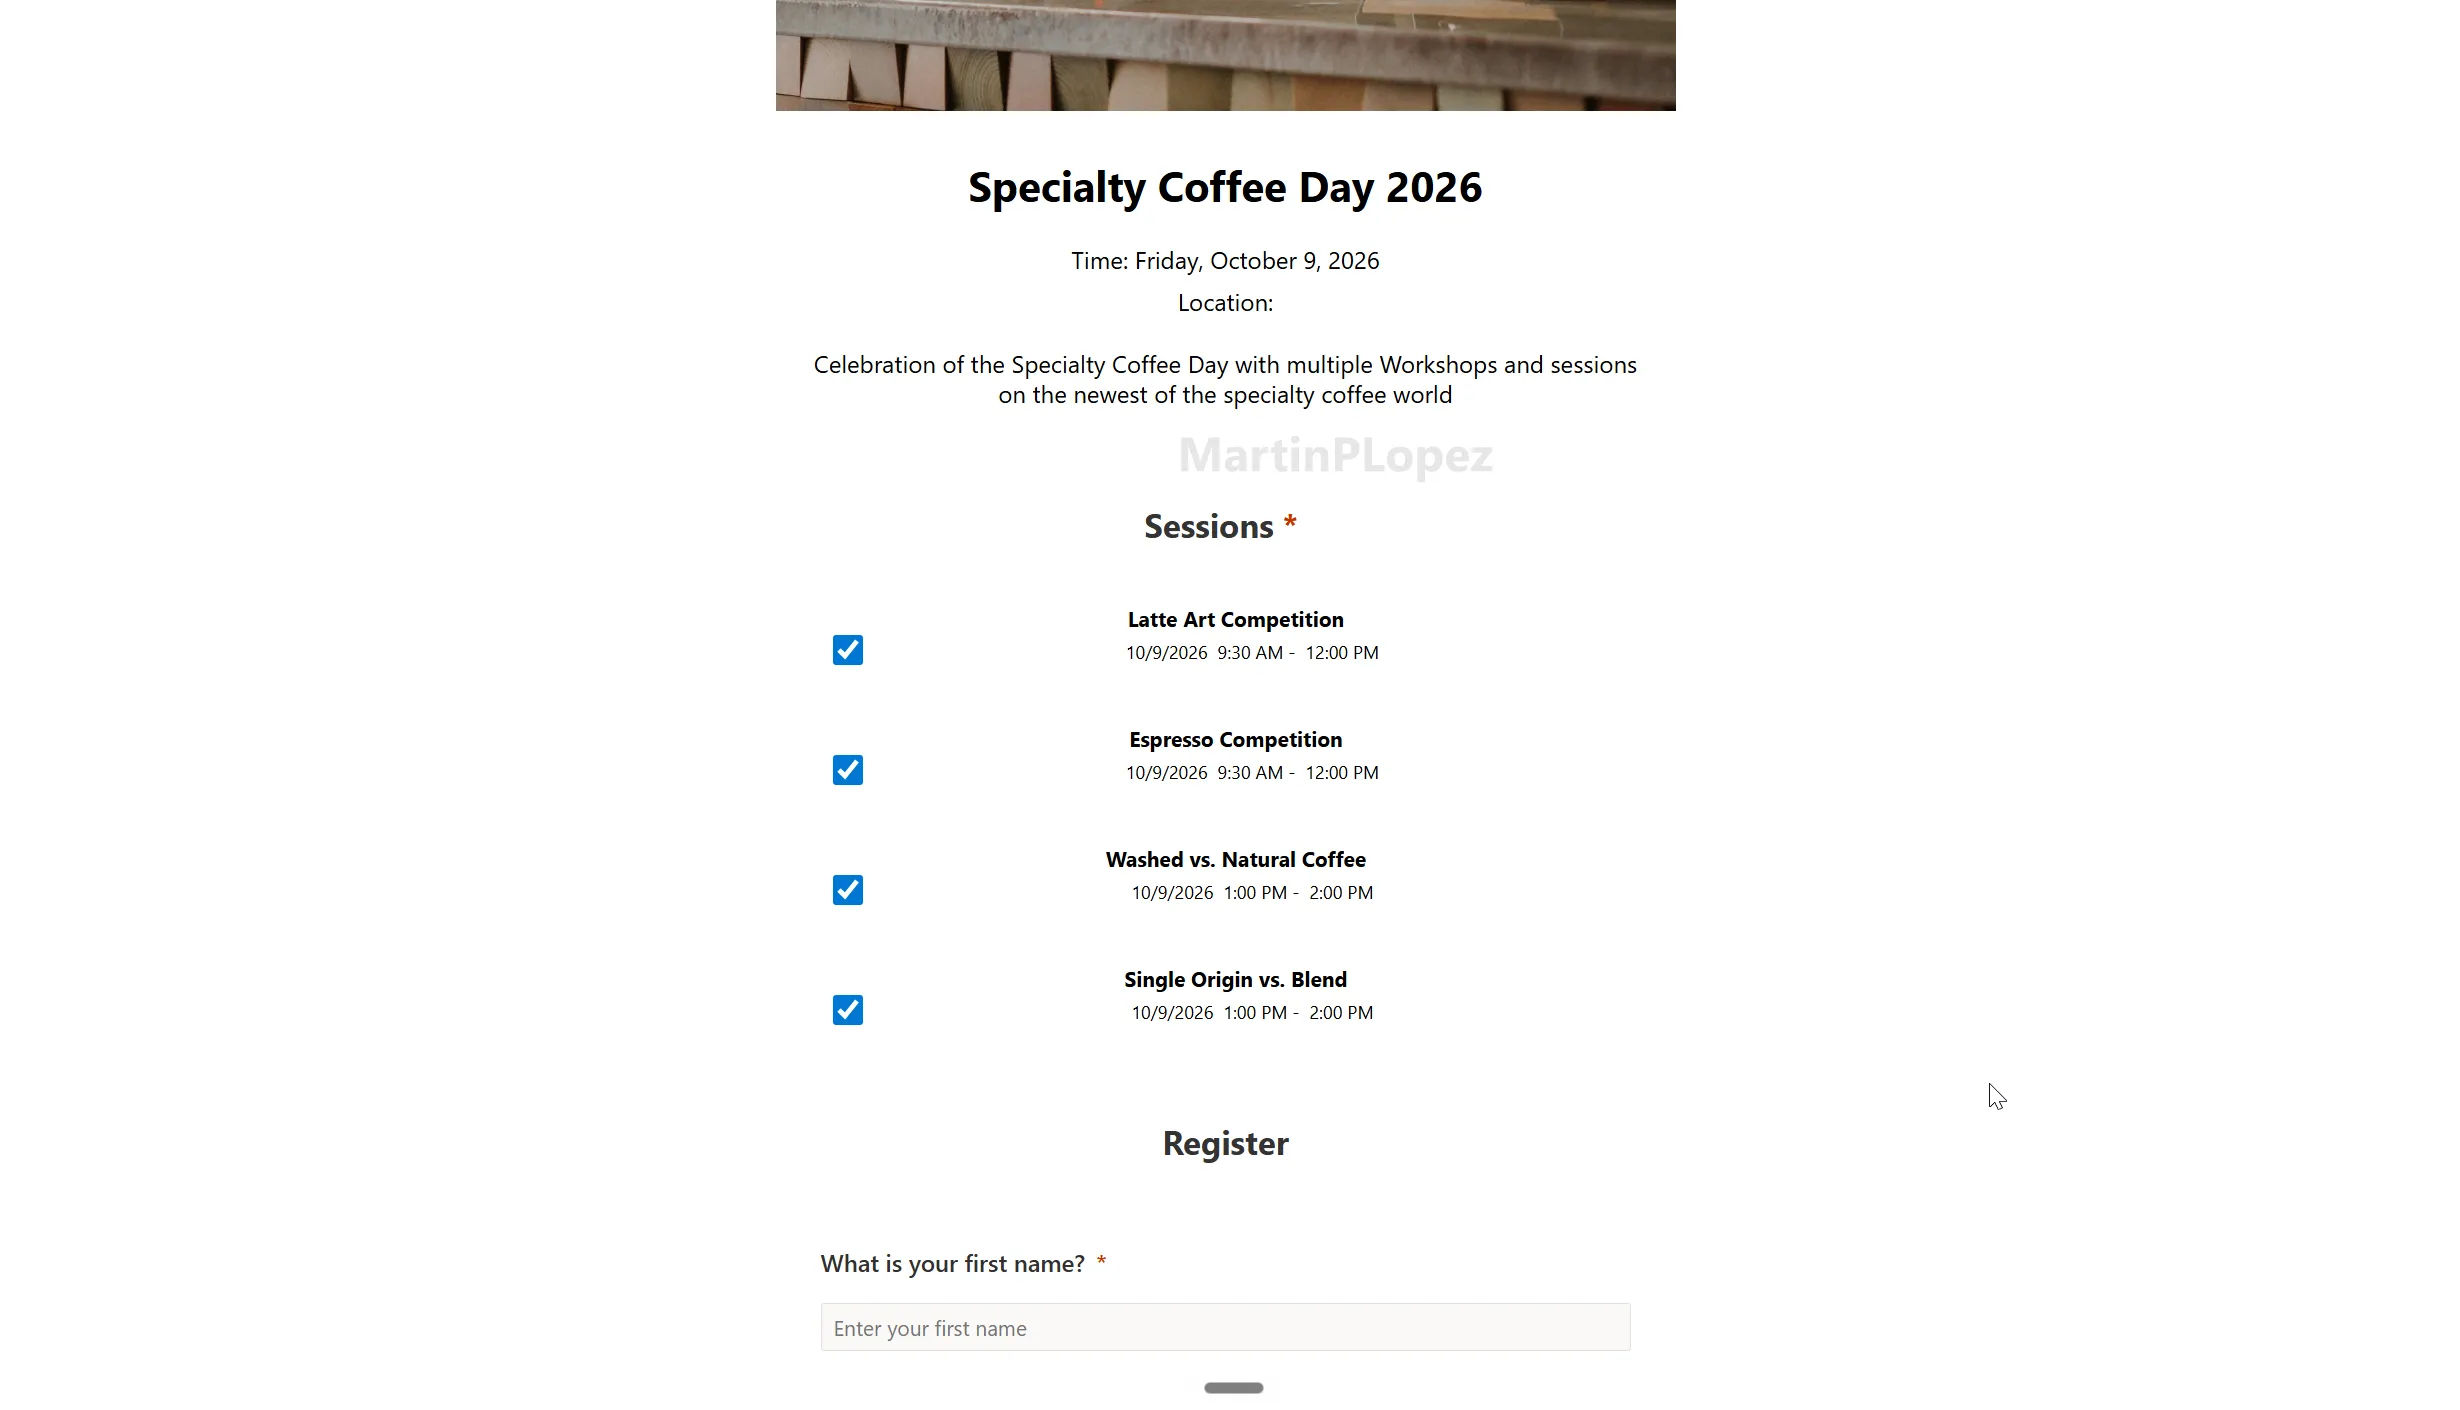
For instance, if you are displaying different sessions that happen at the same time, in the standard form people can subscribe to different sessions that happen at the same time. In order to prevent this, you have to directly edit the HTML by adding some CSS and custom JavaScript to allow the one-session-per-time-slot logic to take place.
Customer Insights - Journeys does have an option to allow only one session registration, but that doesn’t solve this scenario: attendees should still be able to select multiple sessions throughout the day, just not overlapping ones.
Luckily, AI can speed up the JavaScript and CSS work considerably, but the important part is defining and testing the registration logic correctly. Especially around overlapping times, mobile behaviour, and different event configurations, but it can give you great results like the following one:
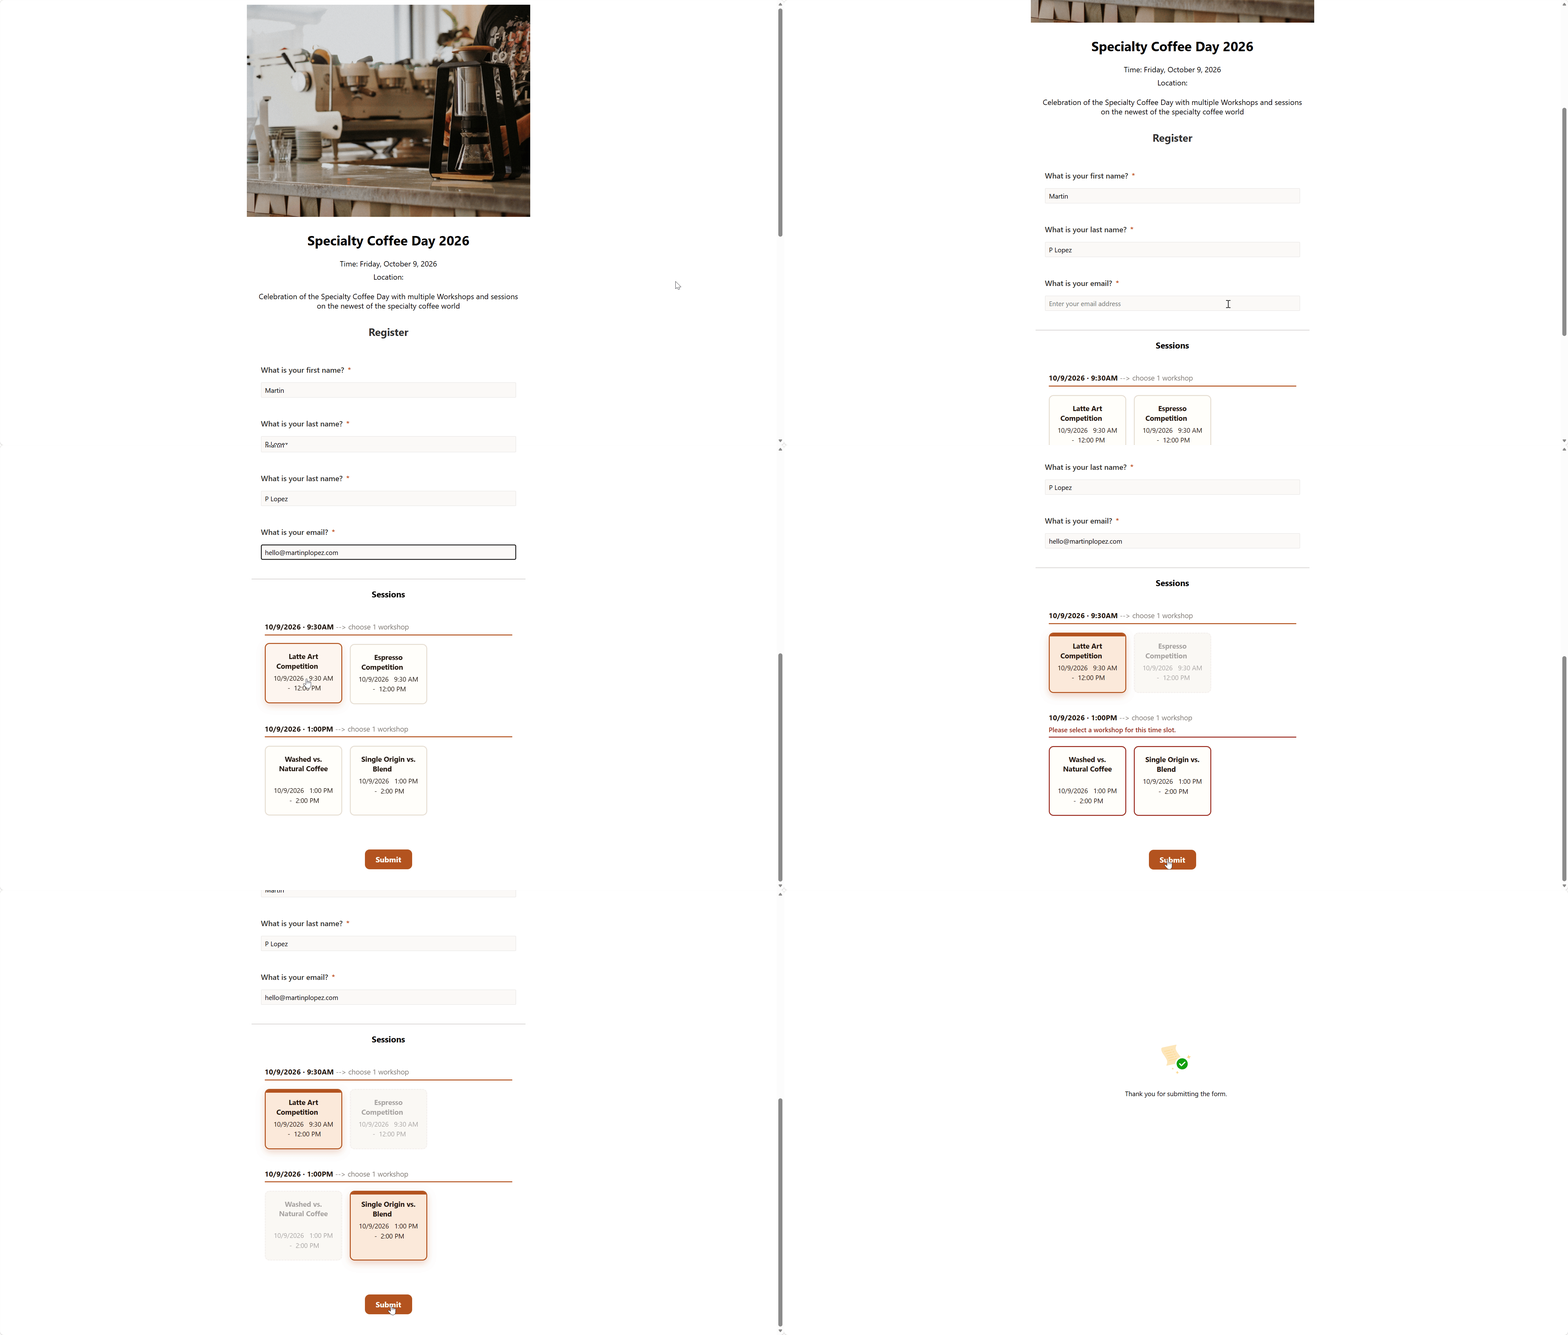
The good thing for making a nice-looking form for sessions is that you can reuse it for multiple events, especially once you’ve implemented the one-session-per-time-slot logic.
TIP
Thank you Page
Mind the Thank you page, if you reuse the default form, it will automatically display the sessions that you subscribed to.
You can hide the sessions with a JavaScript or customize the thank you and add the sessions as I described in this article
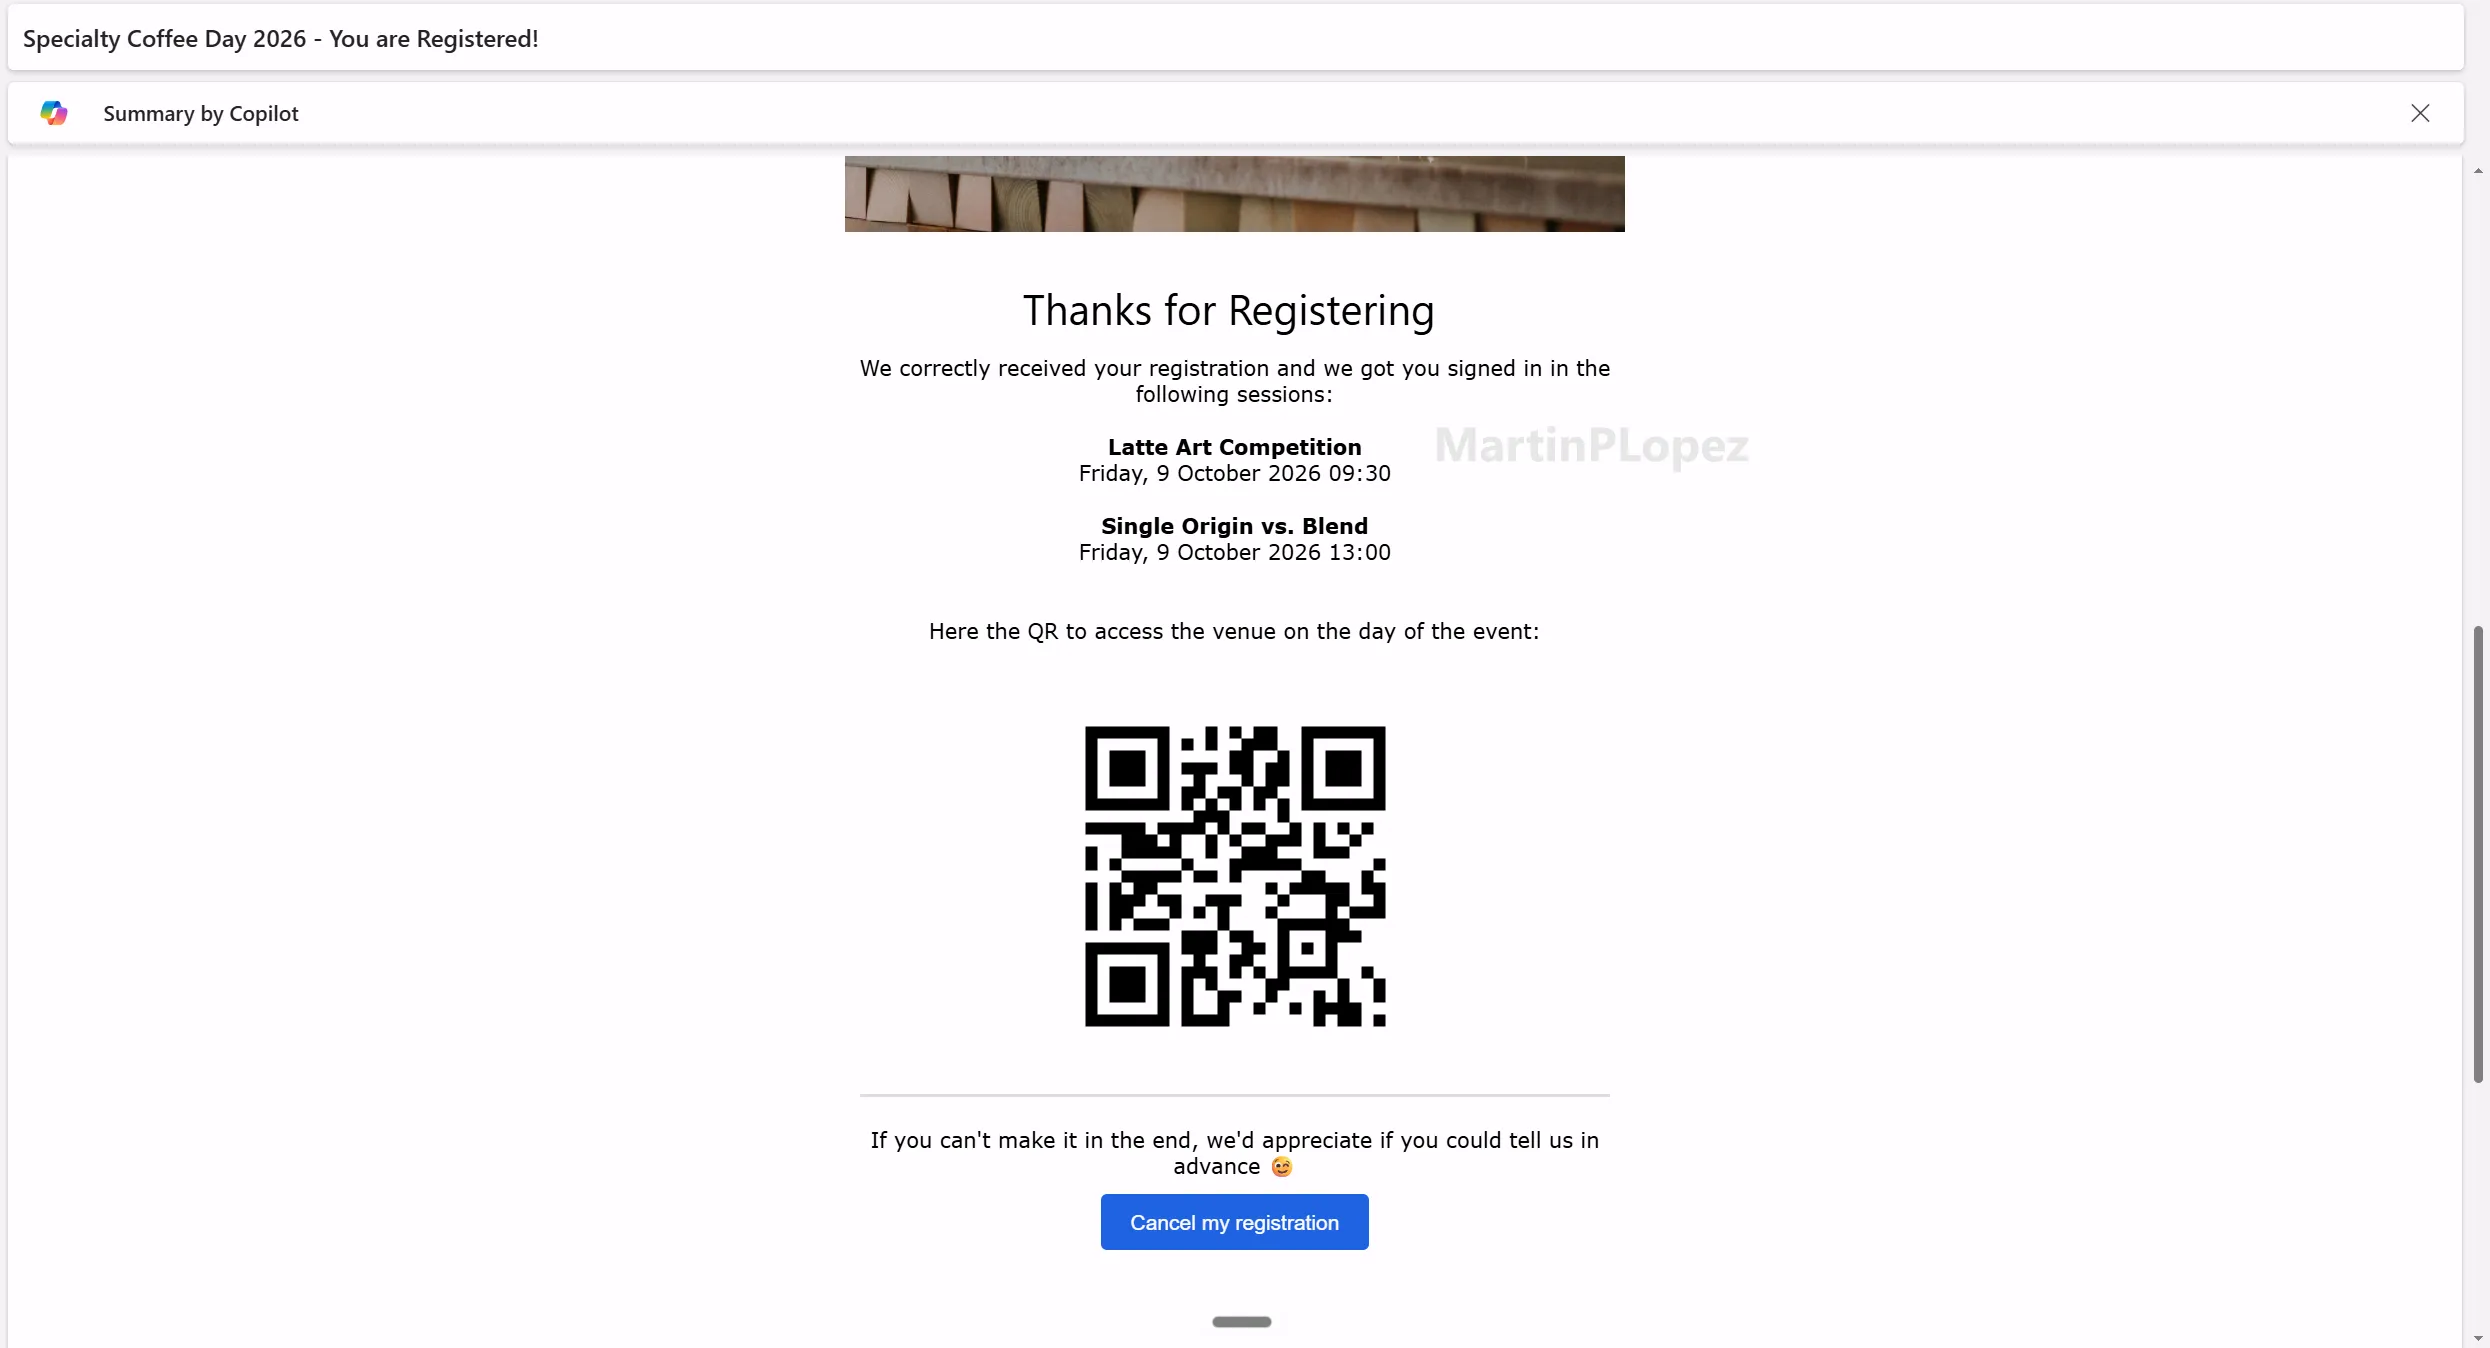
3. Lists are fantastic for emailing session details, you just have to know how
To include the sessions an attendee registered for in an email, make sure you’re working with the Session Registration table rather than the Session table, with the following structure: Marketing Event Registration Reference --> Session Registrations:
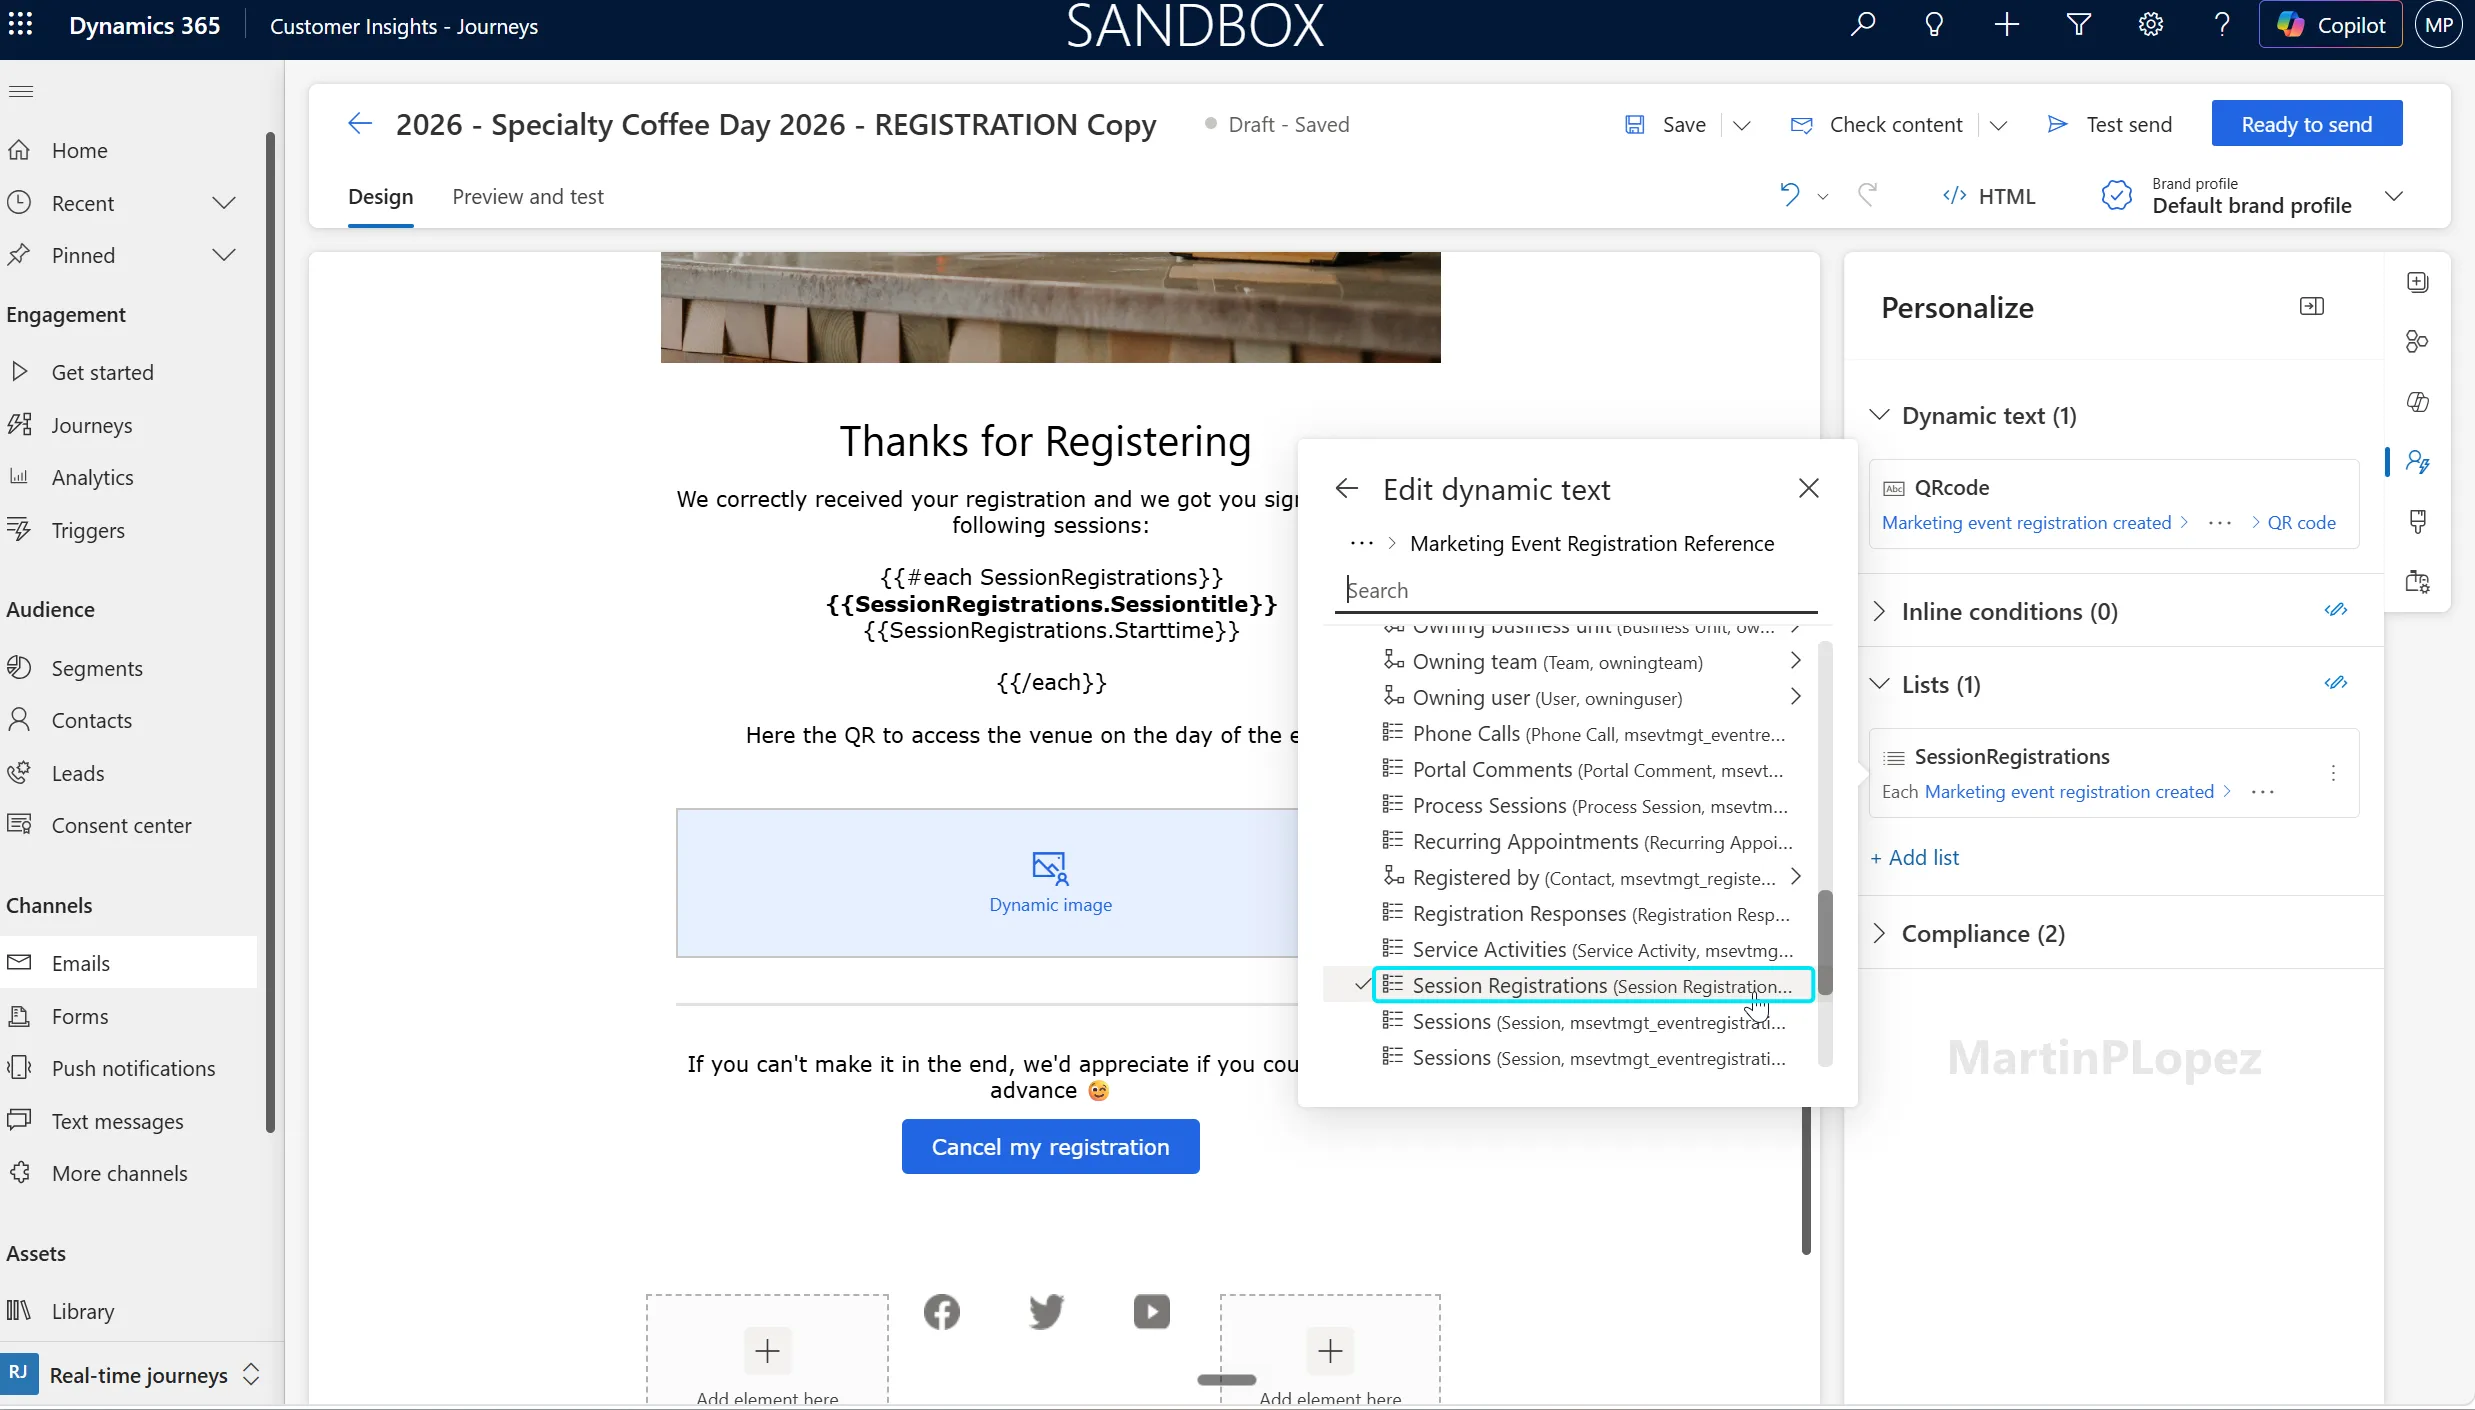
The challenge is that the session start time belongs to the Session record, not the Session Registration record. Because of that, I couldn’t reliably sort my session-registration list chronologically using the field I actually needed.
My workaround for this was to create a field on the session registration table called session start. It is a formula field that will automatically get the start time from the session and put it on your session registration.
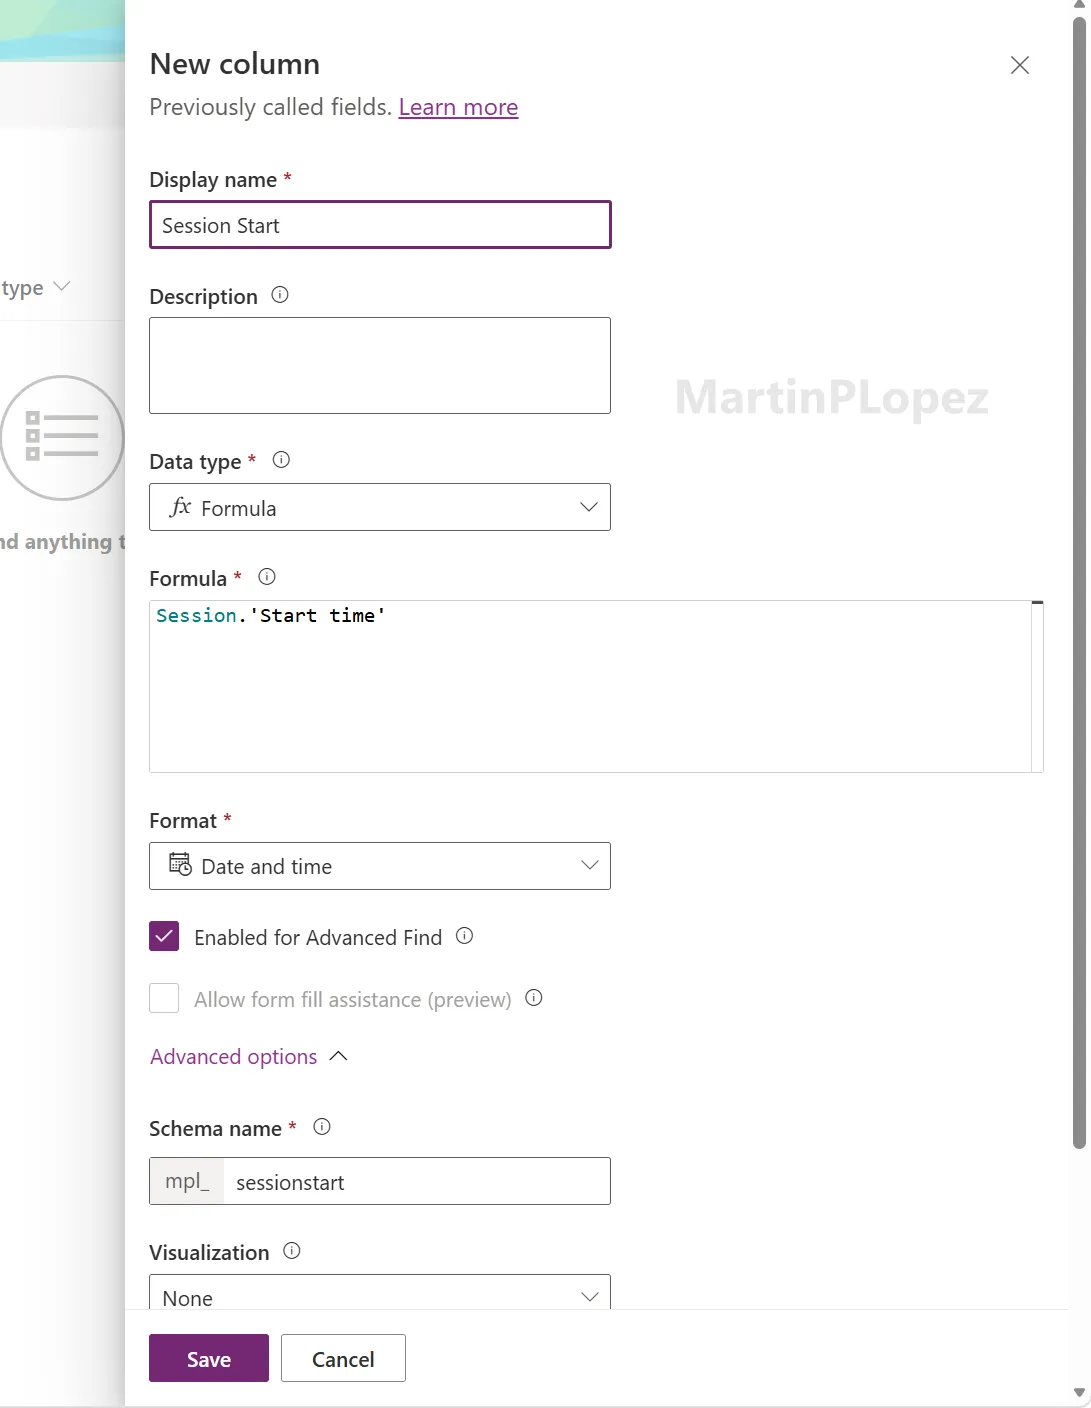
This allows you to sort the session registrations by start date, making the agenda in the email much more natural for the attendee.
4. Be intentional about allowing attendees to cancel individual sessions
When testing to cancel my registrations for the event or the sessions, I discovered first that the phone view of the standard cancellation form is terrible.
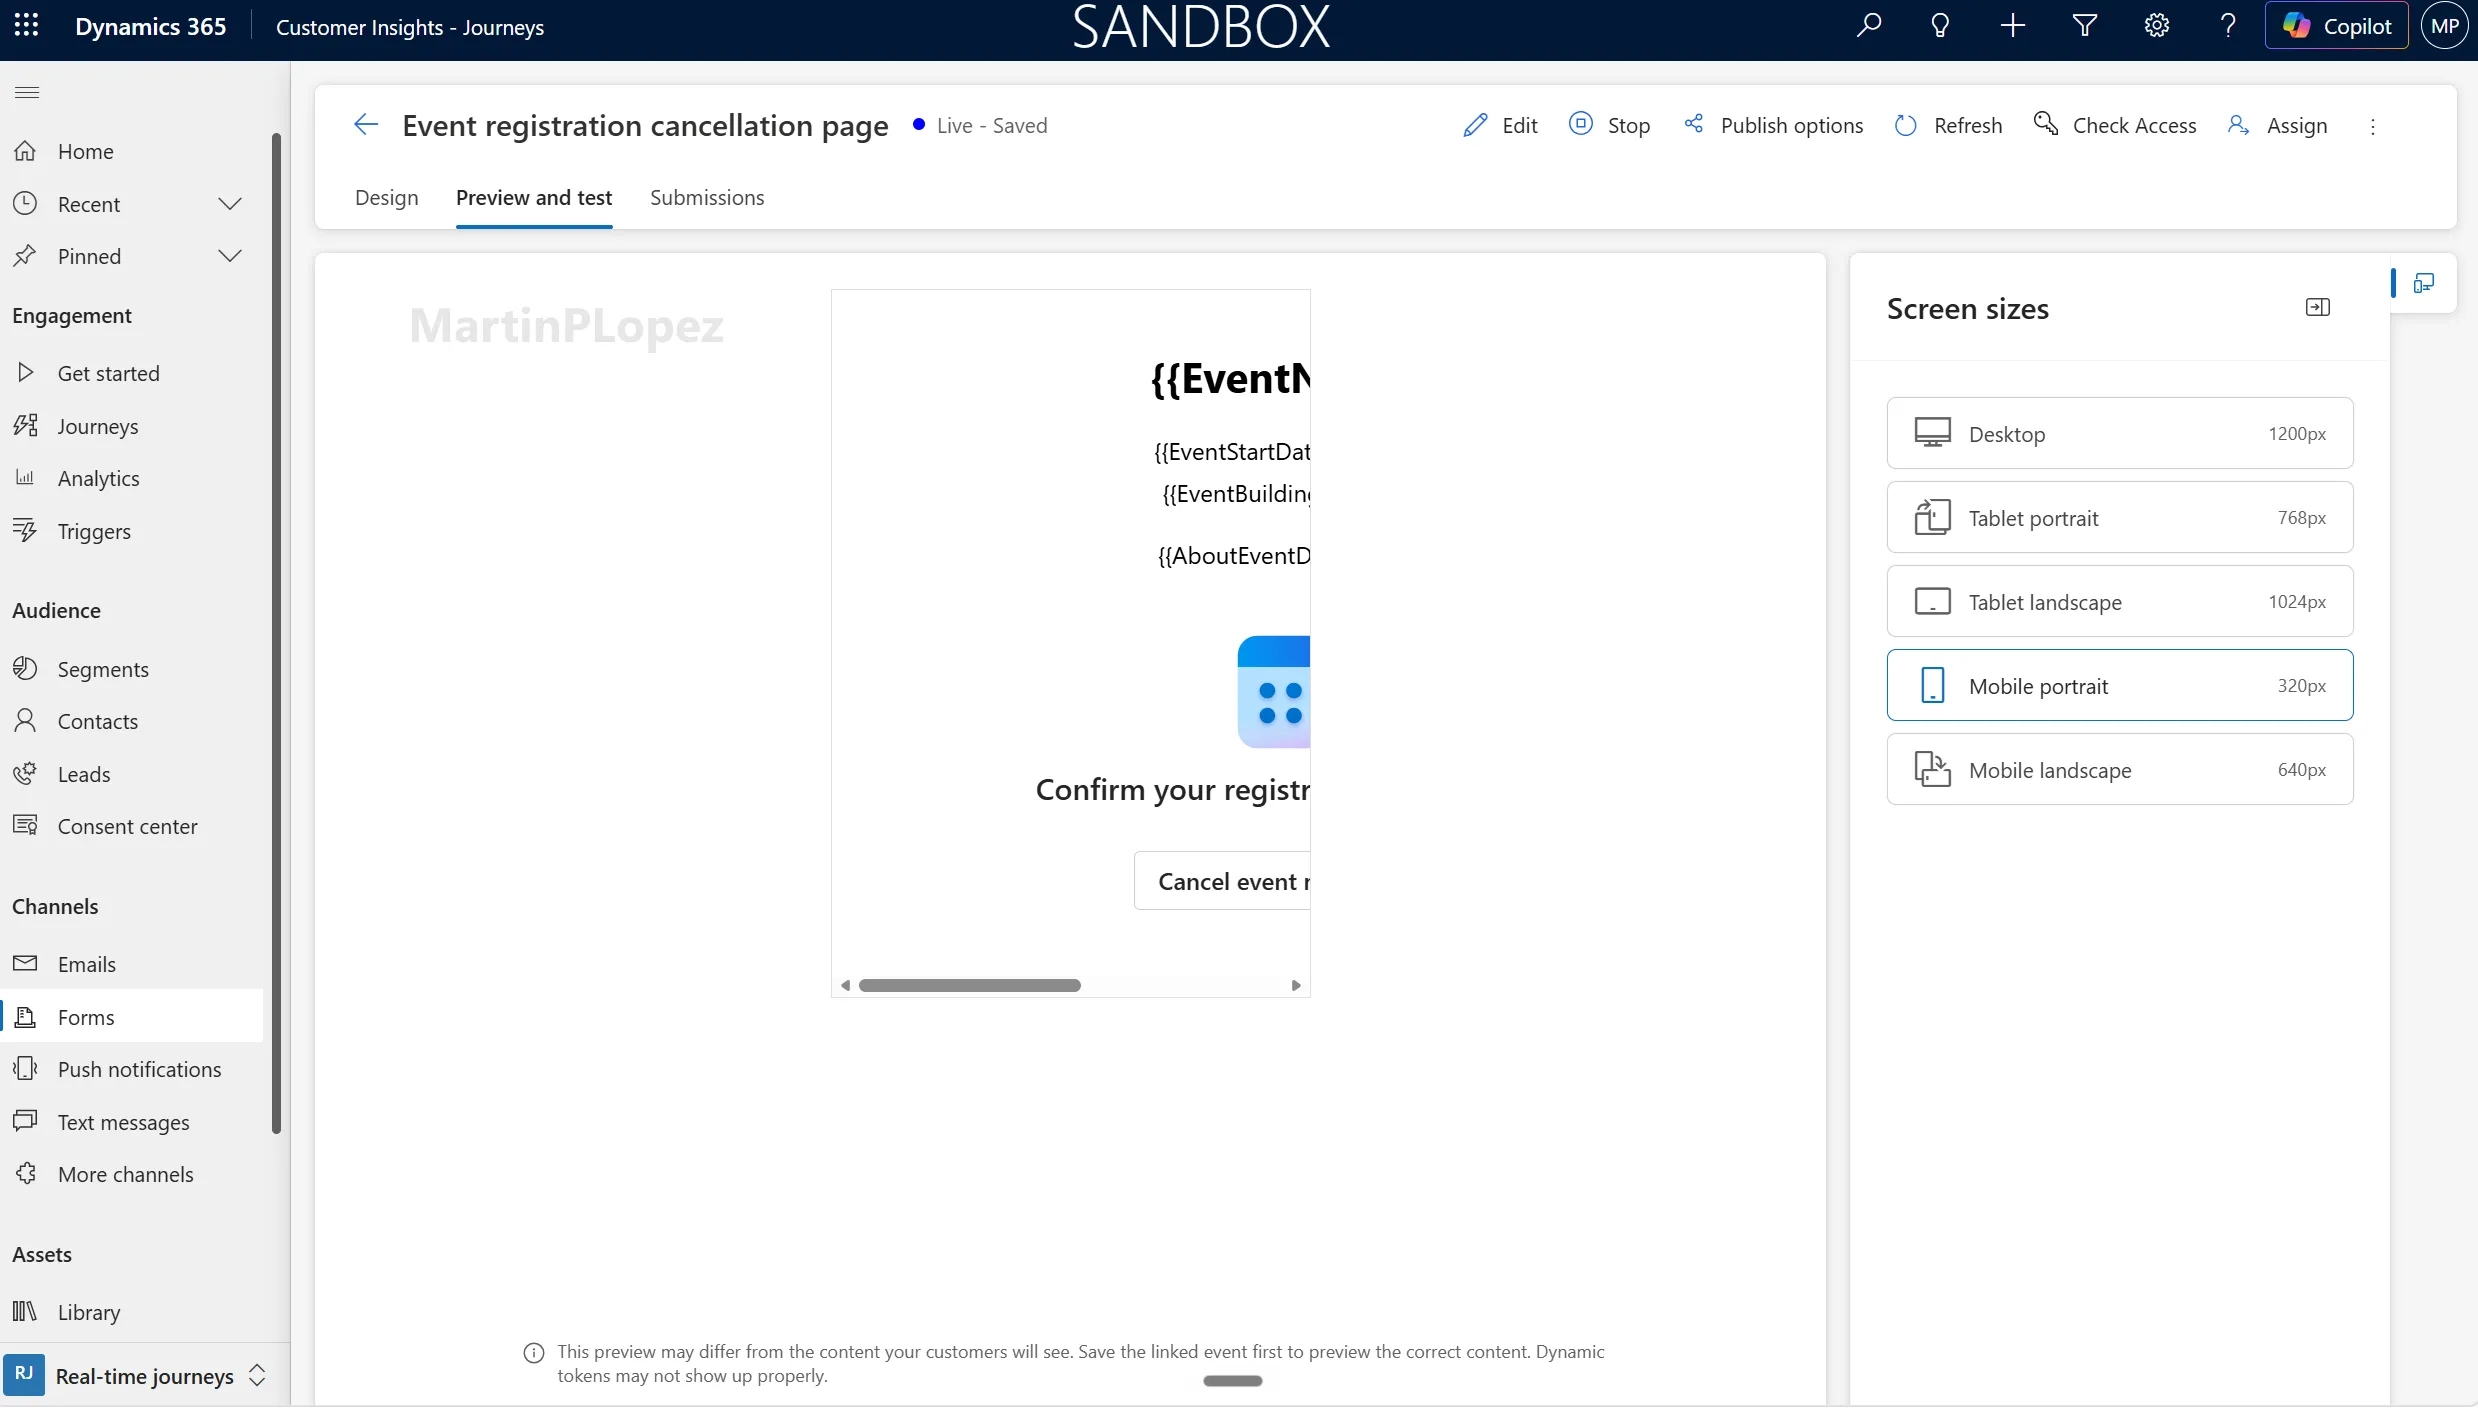
And second, it will allow you, when you have registered sessions, to cancel your session registrations. The problem is that this is a standard form, so it will display all the live session registrations of the event, even the ones that the person didn’t register for.
Clicking a session the user isn’t registered for has no effect. Clicking a session they are registered for cancels their registration.
Most of my clients don’t want attendees to have the option to cancel individual sessions, especially since they can’t register for a replacement session from the same page.
My recommendation here is to:
- Make the form responsive for phones 🙏
- Hide or disable the session-level cancellation controls with JavaScript so attendees can only cancel their entire event registration.
I normally recommend this because there is only one standard cancellation form. I try to avoid heavily customizing it, as it will be reused for all the cancellation options of all your events. When your event doesn’t have sessions, it will also use this one.
There are certain ways to prevent this by linking emails to a certain cancellation form, but it makes the logic a bit more complex than what the clients are normally looking for.
Conclusion
Sessions are one of those Customer Insights - Journeys features that look straightforward until you start applying real event requirements to them.
If I were implementing a multi-session event tomorrow, I would spend most of my time thinking about the attendee experience: Can they accidentally select overlapping sessions? Is their agenda clear in the confirmation email? And do the cancellation options match what the event organizer actually wants?
The standard session functionality gives you a good foundation, but don’t assume the default registration and cancellation experiences will cover every requirement. Test the complete journey from registration to confirmation to cancellation before going live.
And if your event has three workshops happening at 10:00, make sure your attendees can’t somehow be in all three. 😉
One useful CI-J idea, every other Friday.
Sign up for my newsletter and be the first to know about new blog articles, Customer Insights discoveries, and more.